
Why Use OCR and Tesseract.js?
OCR, or Optical Character Recognition, is an invaluable technology for converting images containing text into machine-readable data. Tesseract.js, a JavaScript port of the renowned Tesseract OCR engine, brings this capability directly into your web and Node.js applications without requiring a backend server. It’s particularly useful for tasks like digitizing printed documents, extracting text from images, or automating data entry processes. Tesseract.js stands out because it’s easy to integrate, supports multiple languages, and provides good performance even in a purely client-side environment. Combining it with TypeScript enhances the development experience, offering robust type-checking and better error handling, which leads to more maintainable and error-resistant code.
Thank me by sharing on Twitter 🙏
Setting Up Tesseract.js in TypeScript
First things first, you’ll need to install tesseract.js. This library is a pure JavaScript port of the popular Tesseract OCR engine, making it easy to integrate into your TypeScript projects.
To get started, install the tesseract.js package:
npm install tesseract.jsOnce the library is installed, you’re ready to start writing some code. I’ll walk you through a simple example where we’ll extract text from an image file.
Performing OCR on an Image
The core of our task is to read an image and extract text from it. The tesseract.js library makes this surprisingly straightforward. Here’s a basic example of how to perform OCR using TypeScript:

Co-Intelligence: Living and Working with AI
$13.78 (as of April 22, 2025 14:47 GMT +00:00 - More infoProduct prices and availability are accurate as of the date/time indicated and are subject to change. Any price and availability information displayed on [relevant Amazon Site(s), as applicable] at the time of purchase will apply to the purchase of this product.)
uni SD Card Reader, High-Speed USB C to Micro SD Card Adapter USB 3.0 Dual Slots, Memory Card Reader for SD/Micro SD/SDHC/SDXC/MMC, Compatible with MacBook Pro/Air, Chromebook, Android Galaxy
$9.99 (as of April 23, 2025 14:48 GMT +00:00 - More infoProduct prices and availability are accurate as of the date/time indicated and are subject to change. Any price and availability information displayed on [relevant Amazon Site(s), as applicable] at the time of purchase will apply to the purchase of this product.)
Elon Musk
$18.69 (as of April 22, 2025 14:47 GMT +00:00 - More infoProduct prices and availability are accurate as of the date/time indicated and are subject to change. Any price and availability information displayed on [relevant Amazon Site(s), as applicable] at the time of purchase will apply to the purchase of this product.)import Tesseract from 'tesseract.js';
// Function to perform OCR on an image
async function performOCR(imagePath: string): Promise<string> {
try {
const { data: { text } } = await Tesseract.recognize(
imagePath,
'eng', // Specify the language
{
logger: (m) => console.log(m), // Optional: Log OCR progress
}
);
return text;
} catch (error) {
console.error('Error performing OCR:', error);
throw error;
}
}
// Example usage
const imagePath = 'path/to/your/image.png'; // Replace with your image path
performOCR(imagePath)
.then((text) => {
console.log('Recognized text:', text);
})
.catch((error) => {
console.error('OCR failed:', error);
});This function, performOCR, takes the path to an image as its argument and returns the extracted text. The recognize function from tesseract.js does the heavy lifting, processing the image and returning the recognized text. The logger function is an optional feature that logs the progress of the OCR process to the console, which can be particularly useful when dealing with large images.
Try it out
See example Github repo link here.
To test this out I generated an image from https://www.mockofun.com/ and placed it in image folder:
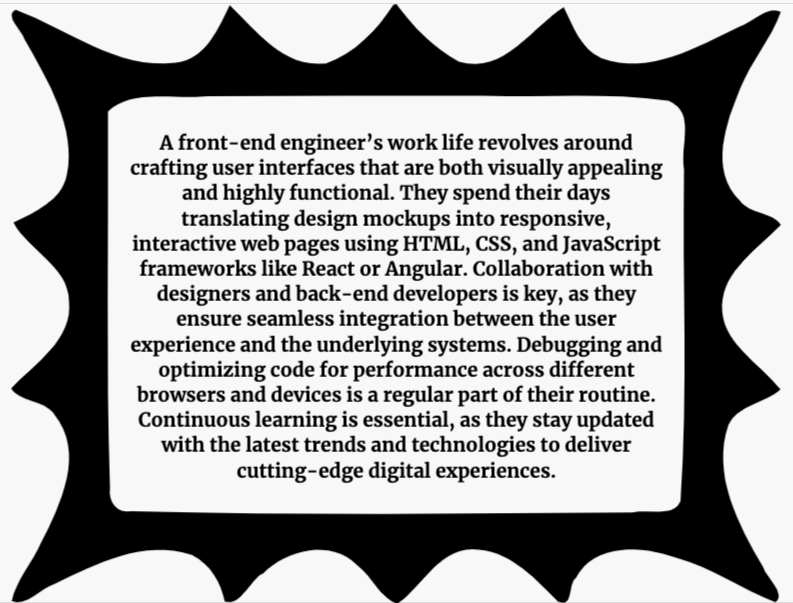
Running the above code against this image looks like this:
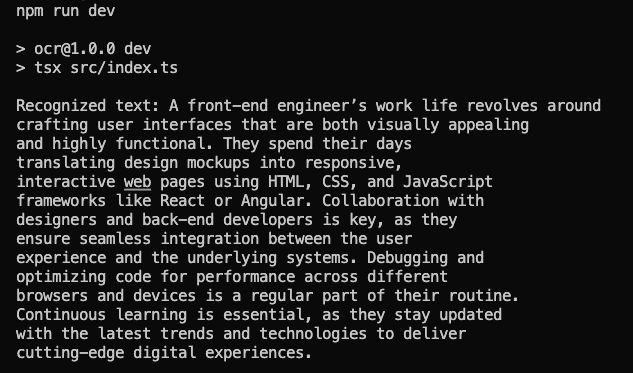
Worked the first time impressive results.
Handling Errors and Edge Cases
When working with OCR, it’s essential to consider what might go wrong. For example, the image might be of poor quality, or the text might be in an unsupported language. In the performOCR function above, I’ve included basic error handling using a try-catch block. If Tesseract encounters an issue, it will throw an error that we can catch and log. This helps in identifying problems without crashing your application.
Additionally, you may encounter situations where the text extracted is not accurate or incomplete. This can happen for various reasons, such as low image resolution, complex fonts, or noisy backgrounds. To improve accuracy, consider pre-processing your images (e.g., converting them to grayscale or increasing contrast) before passing them to Tesseract.
Working with Different Languages
Tesseract.js supports multiple languages, and switching between them is simple. The recognize function takes a second argument where you can specify the language code. For instance, if you’re working with Spanish text, you would pass 'spa' as the language code:
const { data: { text } } = await Tesseract.recognize(imagePath, 'spa');If you need to work with multiple languages in a single image, Tesseract allows that as well by passing a string of language codes separated by a plus sign:
const { data: { text } } = await Tesseract.recognize(imagePath, 'eng+spa');This flexibility is one of the strengths of Tesseract.js, making it a versatile tool for various OCR tasks.
Optimizing Performance
OCR can be resource-intensive, especially for large images or documents with lots of text. To optimize performance, consider the following tips:
- Image Preprocessing: As mentioned earlier, pre-processing your images can significantly improve OCR accuracy. Converting an image to grayscale or increasing contrast can help Tesseract better distinguish text from the background.
- Language Selection: Limiting the OCR process to the languages you need can reduce processing time. If you know the text is in English, specifying
'eng'only will speed things up compared to using multiple languages. - Progress Monitoring: The logger function allows you to monitor the OCR process in real-time. This can be particularly useful when processing large images, as you can provide users with feedback on the progress.
- Running OCR in a Web Worker: If you’re running OCR in a browser environment, consider using Web Workers to offload the processing from the main thread. This ensures that your application remains responsive while OCR is running.
Putting It All Together
Here’s a more complete example that integrates some of the optimizations and error handling strategies we’ve discussed:
import Tesseract from 'tesseract.js';

// Function to perform OCR with optimized settings
async function performOptimizedOCR(imagePath: string): Promise<string> {
  try {
    const { data: { text } } = await Tesseract.recognize(
      imagePath,
      'eng',
      {
        logger: (m) => console.log(m), // Log OCR progress
      }
    );
    return text;
  } catch (error) {
    console.error('Error performing OCR:', error);
    throw error;
  }
}

// Usage example with optimized OCR
const imagePath = 'path/to/your/optimized-image.png';

performOptimizedOCR(imagePath)
  .then((text) => {
    console.log('Recognized text:', text);
  })
  .catch((error) => {
    console.error('OCR failed:', error);
  });
This example shows a more polished approach to performing OCR in TypeScript, with additional logging and error handling to make the process smoother.
Conclusion
Using OCR in TypeScript with tesseract.js opens up a world of possibilities for automating text extraction from images. Whether you’re dealing with scanned documents, analyzing text in photos, or simply need to extract information from screenshots, this powerful combination allows you to do so efficiently and accurately. With TypeScript’s strong typing and the flexibility of tesseract.js, you can build reliable and robust OCR features into your applications, making your workflows faster and more efficient.
See example Github repo link here.


