Creating a camera preview in an Android application might sound like a daunting task, but it’s a rewarding journey that lets you interact directly with hardware. In this post, I’ll guide you through building an app that shows your camera feed on the screen using the Camera2 API and Kotlin. Along the way, I’ll share a complete code example and break it into manageable steps to help you follow along with ease.
Thank me by sharing on Twitter 🙏
Why Use Camera2 API for Camera Previews
The Camera2 API provides developers with more granular control over camera features compared to its predecessor. It allows you to manage advanced functionalities like capturing high-resolution images, recording videos, and setting up a real-time camera preview. In this app, the focus is on displaying the camera feed in real time using a TextureView. This approach is modern and ensures compatibility with newer Android devices while allowing backward compatibility when handled properly.

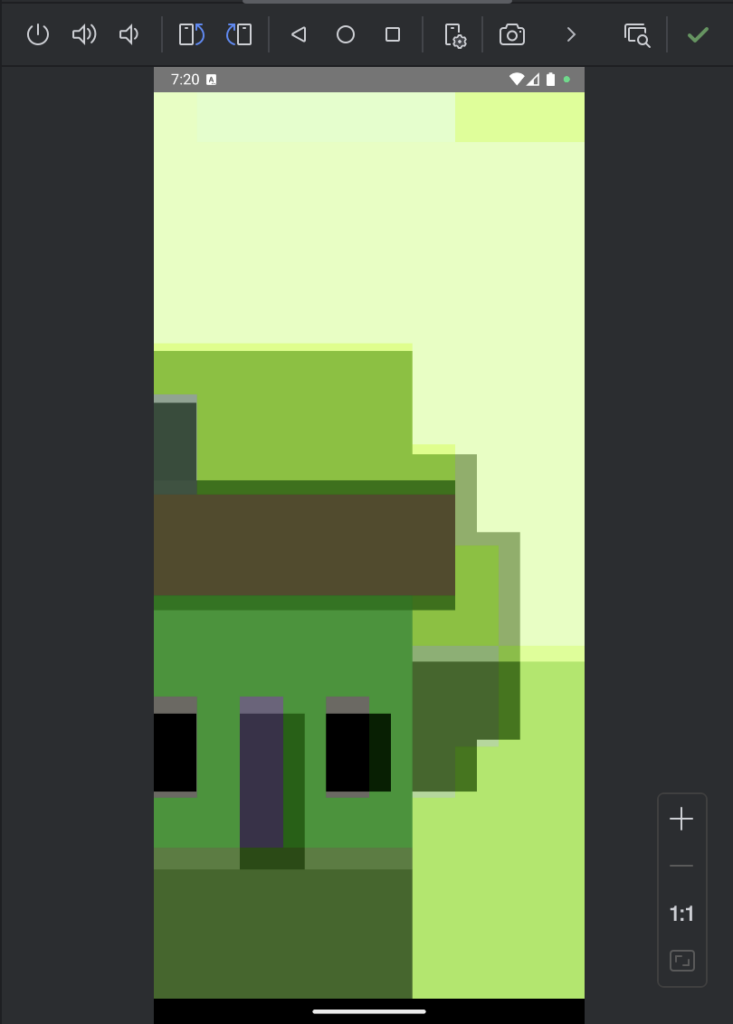
The code from this post running in the Android Studio’s emulator.
Setting Up Your Project
Before diving into the code, it’s essential to ensure that the necessary permissions and dependencies are in place.
- Add Permissions: To access the camera, your app needs explicit permission. Open your
AndroidManifest.xmlfile and include the following:<uses-permission android:name="android.permission.CAMERA" /> <uses-feature android:name="android.hardware.camera" android:required="true" />This ensures your app can access the camera hardware and lets the user know it’s required. - Prepare for Runtime Permissions: Starting from Android 6.0 (API 23), permissions must be requested dynamically. We’ll cover that as part of the app logic.
- Set Up Your Layout: Use a
TextureViewin youractivity_main.xmlfile to display the camera feed:<TextureView android:id="@+id/textureView" android:layout_width="match_parent" android:layout_height="match_parent" />
Writing the Code for Camera Preview
Now let’s walk through the Kotlin code step-by-step. The app has two main tasks: initializing the camera and displaying its feed on the screen. Here’s how you can achieve this:
etguuds USB to USB C Cable 3ft, 2-Pack USB A to Type C Charger Cord Fast Charging for Samsung Galaxy A15 A25 A35 A55 A54, S24 S23 S22 S21 S20 S10 S10E, Note 20 10, Moto G, for iPhone 16 15, Gray
$6.99 (as of February 25, 2025 13:13 GMT +00:00 - More infoProduct prices and availability are accurate as of the date/time indicated and are subject to change. Any price and availability information displayed on [relevant Amazon Site(s), as applicable] at the time of purchase will apply to the purchase of this product.)4Pack [Apple MFi Certified] Charger Lightning to USB Charging Cable Cord Compatible iPhone 14/13/12/11 Pro/11/XS MAX/XR/8/7/6s Plus,iPad Pro/Air/Mini,iPod Touch
$7.99 (as of February 25, 2025 13:13 GMT +00:00 - More infoProduct prices and availability are accurate as of the date/time indicated and are subject to change. Any price and availability information displayed on [relevant Amazon Site(s), as applicable] at the time of purchase will apply to the purchase of this product.)AI Engineering: Building Applications with Foundation Models
$63.57 (as of February 25, 2025 13:13 GMT +00:00 - More infoProduct prices and availability are accurate as of the date/time indicated and are subject to change. Any price and availability information displayed on [relevant Amazon Site(s), as applicable] at the time of purchase will apply to the purchase of this product.)Initializing the Camera
In the MainActivity, I initialized the TextureView and set a listener to know when it’s ready. This is crucial because the camera can only start once the SurfaceTexture is available.
textureView = findViewById(R.id.textureView)
textureView.surfaceTextureListener = object : TextureView.SurfaceTextureListener {
    override fun onSurfaceTextureAvailable(surface: SurfaceTexture, width: Int, height: Int) {
        openCamera()
    }

    override fun onSurfaceTextureSizeChanged(surface: SurfaceTexture, width: Int, height: Int) {}
    override fun onSurfaceTextureDestroyed(surface: SurfaceTexture): Boolean = true
    override fun onSurfaceTextureUpdated(surface: SurfaceTexture) {}
}
The openCamera() method connects to the camera hardware and prepares it for use. Using the CameraManager class, I fetched the first camera available and opened it.
private fun openCamera() {
    val cameraManager = getSystemService(CAMERA_SERVICE) as CameraManager
    try {
        val cameraId = cameraManager.cameraIdList[0]
        if (ActivityCompat.checkSelfPermission(this, Manifest.permission.CAMERA) != PackageManager.PERMISSION_GRANTED) {
            ActivityCompat.requestPermissions(this, arrayOf(Manifest.permission.CAMERA), 101)
            return
        }
        cameraManager.openCamera(cameraId, object : CameraDevice.StateCallback() {
            override fun onOpened(camera: CameraDevice) {
                cameraDevice = camera
                startCameraPreview()
            }

            override fun onDisconnected(camera: CameraDevice) {
                camera.close()
                cameraDevice = null
            }

            override fun onError(camera: CameraDevice, error: Int) {
                camera.close()
                cameraDevice = null
            }
        }, null)
    } catch (e: CameraAccessException) {
        e.printStackTrace()
    }
}
This method ensures permissions are in place and opens the camera safely. If the user denies permission, the app won’t proceed.
Setting Up the Preview
Displaying the camera feed is where the magic happens. With the Camera2 API, you can configure sessions to send the video stream to a Surface. Here’s how I started the preview:
@RequiresApi(Build.VERSION_CODES.P)
private fun startCameraPreview() {
    val surfaceTexture = textureView.surfaceTexture ?: return
    surfaceTexture.setDefaultBufferSize(1920, 1080)
    val surface = Surface(surfaceTexture)

    val captureRequestBuilder = cameraDevice?.createCaptureRequest(CameraDevice.TEMPLATE_PREVIEW)

    captureRequestBuilder?.let { builder ->
        builder.addTarget(surface)

        val outputConfiguration = OutputConfiguration(surface)
        val executor = Executors.newSingleThreadExecutor()

        val sessionConfiguration = SessionConfiguration(
            SessionConfiguration.SESSION_REGULAR,
            listOf(outputConfiguration),
            executor,
            object : CameraCaptureSession.StateCallback() {
                override fun onConfigured(session: CameraCaptureSession) {
                    try {
                        session.setRepeatingRequest(builder.build(), null, null)
                    } catch (e: CameraAccessException) {
                        e.printStackTrace()
                    }
                }

                override fun onConfigureFailed(session: CameraCaptureSession) {
                    // Handle configuration failure
                }
            }
        )

        cameraDevice?.createCaptureSession(sessionConfiguration)
    }
}
This method configures a session with the SessionConfiguration class, introduced in API level 28. It connects the Surface to the camera’s output and starts streaming the feed onto the TextureView.
Cleaning Up Resources
It’s important to release camera resources when they are no longer needed. I handled this in the onDestroy method to avoid memory leaks or locking the camera hardware.
override fun onDestroy() {
    super.onDestroy()
    cameraDevice?.close()
    cameraDevice = null
}
This ensures that the camera is properly closed when the activity is destroyed.
Making It Work for Older API Levels
The SessionConfiguration class is available only from API level 28 onward. If you need to support devices with API levels 24 to 27, you can fall back to the older createCaptureSession method, which is deprecated but still functional for backward compatibility. Here’s an alternative implementation:
private fun startCameraPreviewLegacy() {
    val surfaceTexture = textureView.surfaceTexture ?: return
    surfaceTexture.setDefaultBufferSize(1920, 1080)
    val surface = Surface(surfaceTexture)

    val captureRequestBuilder = cameraDevice?.createCaptureRequest(CameraDevice.TEMPLATE_PREVIEW)

    try {
        cameraDevice?.createCaptureSession(
            listOf(surface),
            object : CameraCaptureSession.StateCallback() {
                override fun onConfigured(session: CameraCaptureSession) {
                    try {
                        captureRequestBuilder?.let {
                            session.setRepeatingRequest(it.build(), null, null)
                        }
                    } catch (e: CameraAccessException) {
                        e.printStackTrace()
                    }
                }

                override fun onConfigureFailed(session: CameraCaptureSession) {}
            },
            null
        )
    } catch (e: CameraAccessException) {
        e.printStackTrace()
    }
}
Use a runtime check to decide which method to call:
if (Build.VERSION.SDK_INT >= Build.VERSION_CODES.P) {
    startCameraPreview()
} else {
    startCameraPreviewLegacy()
}
Wrapping It Up
Building an Android app with a live camera feed is a rewarding project. It involves working closely with hardware while ensuring the code is robust and handles device compatibility. The Camera2 API offers the flexibility to achieve this and much more. With the code shared here, you can easily create a simple camera preview app and extend it further to include features like capturing photos or recording videos.


