Introduction
As a developer, there are times when you need to allow users to edit JSON data directly within your React applications. While libraries like react-json-view offer a quick and powerful solution, sometimes you might want to implement a custom editor to better fit your application’s needs. In this blog post, I’ll walk you through how to build a JSON editor in React using both react-json-view and a custom implementation. We’ll use TypeScript for our code examples to ensure type safety and better development practices.
Thank me by sharing on Twitter 🙏
Using react-json-view for a JSON Editor
Step 1: Install @microlink/react-json-view
First, let’s start by installing @microlink/react-json-view, a maintained and powerful library for editing JSON data in React.
npm install @microlink/react-json-viewStep 2: Create the JSON Editor Component
Next, we’ll create a JSON editor component using @microlink/react-json-view.
import React, { useState } from 'react';
import ReactJson from '@microlink/react-json-view';

interface JsonEditorProps {
  json: object;
  onChange: (json: object) => void;
}

const JsonEditor: React.FC<JsonEditorProps> = ({ json, onChange }) => {
  const handleJsonChange = (e: any) => {
    onChange(e.updated_src);
  };

  return (
    <div>
      <h1>JSON Editor using react-json-view</h1>
      <ReactJson
        src={json}
        onEdit={handleJsonChange}
        onAdd={handleJsonChange}
        onDelete={handleJsonChange}
        theme="monokai"
      />
    </div>
  );
};

export default JsonEditor;
Step 3: Integrate the Component into Your Application
Now, integrate the JsonEditor component into your main application file.
import React, { useState } from 'react';
import ReactDOM from 'react-dom';
import JsonEditor from './JsonEditor';

const App: React.FC = () => {
  const [json, setJson] = useState({ exampleKey: "exampleValue" });

  const handleJsonChange = (newJson: object) => {
    setJson(newJson);
  };

  return (
    <div>
      <h1>JSON Editor Example</h1>
      <JsonEditor json={json} onChange={handleJsonChange} />
    </div>
  );
};

ReactDOM.render(<App />, document.getElementById('root'));
With these steps, we have a fully functional JSON editor integrated into our React application using react-json-view. This library simplifies the task, providing a user-friendly interface for JSON manipulation.
Apple in China: The Capture of the World's Greatest Company
$15.97 (as of December 13, 2025 19:08 GMT +00:00 - More infoProduct prices and availability are accurate as of the date/time indicated and are subject to change. Any price and availability information displayed on [relevant Amazon Site(s), as applicable] at the time of purchase will apply to the purchase of this product.)Anker Cable [2 Pack, 3FT], USB A to USB C Cable for iPhone 17 Series,Samsung Galaxy S10 S10+, LG V30, Beats Fit Pro and More (Black)
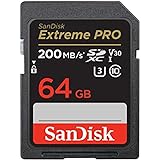
$8.99 (as of December 12, 2025 02:21 GMT +00:00 - More infoProduct prices and availability are accurate as of the date/time indicated and are subject to change. Any price and availability information displayed on [relevant Amazon Site(s), as applicable] at the time of purchase will apply to the purchase of this product.)SanDisk 64GB Extreme PRO SDXC UHS-I Memory Card - C10, U3, V30, 4K UHD, SD Card - SDSDXXU-064G-GN4IN
$17.99 (as of December 12, 2025 02:21 GMT +00:00 - More infoProduct prices and availability are accurate as of the date/time indicated and are subject to change. Any price and availability information displayed on [relevant Amazon Site(s), as applicable] at the time of purchase will apply to the purchase of this product.)Building a Custom JSON Editor
While react-json-view is convenient, there are scenarios where you might need a custom solution. Let’s explore how to create a JSON editor from scratch.
Step 1: Create the JSON Editor Component
We’ll start by creating a JSON editor component with a text area for JSON input.
import React, { useState } from 'react';

interface JsonEditorProps {
  jsonString: string;
  onChange: (jsonString: string) => void;
}

const JsonEditor: React.FC<JsonEditorProps> = ({ jsonString, onChange }) => {
  const [localJsonString, setLocalJsonString] = useState(jsonString);

  const handleJsonChange = (event: React.ChangeEvent<HTMLTextAreaElement>) => {
    setLocalJsonString(event.target.value);
  };

  const saveJson = () => {
    try {
      const parsedJson = JSON.parse(localJsonString);
      onChange(localJsonString);
      alert('JSON is valid and saved.');
    } catch (error) {
      alert('Invalid JSON format.');
    }
  };

  return (
    <div>
      <h1>Custom JSON Editor</h1>
      <textarea
        rows={20}
        cols={50}
        value={localJsonString}
        onChange={handleJsonChange}
      />
      <br />
      <button onClick={saveJson}>Save JSON</button>
    </div>
  );
};

export default JsonEditor;
Step 2: Validate and Save the JSON
We need to ensure the JSON entered by the user is valid. The saveJson function handles this by parsing the JSON string and updating the component state if the JSON is valid.
const saveJson = () => {
  try {
    const parsedJson = JSON.parse(localJsonString);
    onChange(localJsonString);
    alert('JSON is valid and saved.');
  } catch (error) {
    alert('Invalid JSON format.');
  }
};
Step 3: Integrate the Custom JSON Editor into Your Application
Finally, integrate the custom JsonEditor component into your main application file.
import React, { useState } from 'react';
import ReactDOM from 'react-dom';
import JsonEditor from './JsonEditor';

const App: React.FC = () => {
  const [jsonString, setJsonString] = useState(JSON.stringify({ exampleKey: "exampleValue" }, null, 2));
  const [jsonObject, setJsonObject] = useState({ exampleKey: "exampleValue" });

  const handleJsonChange = (newJsonString: string) => {
    setJsonString(newJsonString);
    setJsonObject(JSON.parse(newJsonString));
  };

  return (
    <div>
      <h1>Custom JSON Editor Example</h1>
      <JsonEditor jsonString={jsonString} onChange={handleJsonChange} />
      <h2>Parsed JSON Object</h2>
      <pre>{JSON.stringify(jsonObject, null, 2)}</pre>
    </div>
  );
};

ReactDOM.render(<App />, document.getElementById('root'));
Conclusion
In this blog post, we explored two approaches to building a JSON editor in React: using the @microlink/react-json-view library and implementing a custom solution. Both methods have their advantages. The react-json-view library provides a powerful and easy-to-use interface for JSON editing, while a custom implementation offers more flexibility and control over the user experience.
By following these examples, you can choose the approach that best fits your needs and integrate a JSON editor into your React application. Whether you need the quick setup of react-json-view or the customization potential of a hand-crafted editor, you’re now equipped to handle JSON editing in your projects. Happy coding!


Great article! as a tip I found this JSON Validator & Formatter tool very useful https://mate.tools/json-validator-formatter