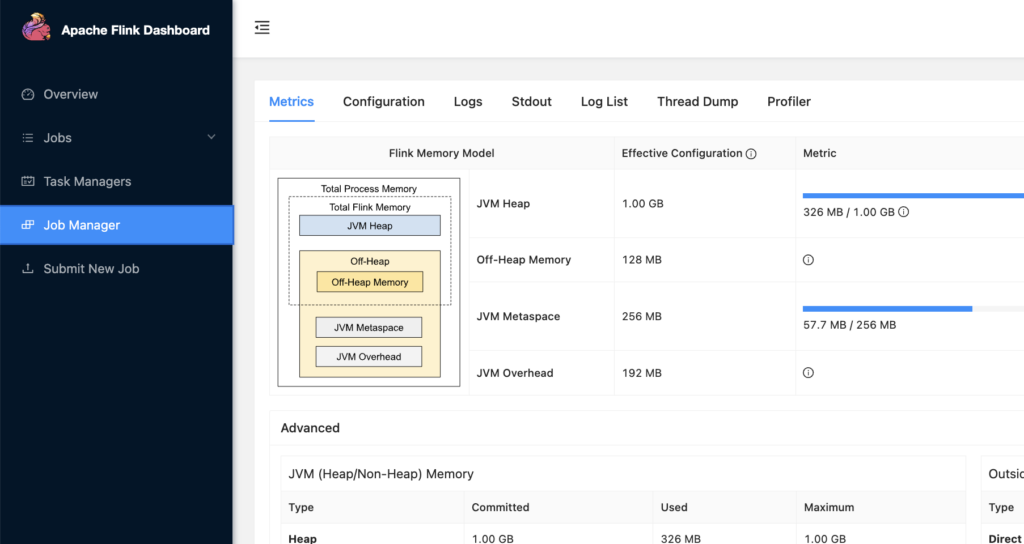
Apache Flink is a powerful tool for processing data streams, but setting it up locally can sometimes feel like an uphill task. As someone who appreciates a smooth development workflow, I’ve found that using Docker simplifies the process immensely. In this post, I’ll walk you through setting up Flink locally using Docker Compose, troubleshooting potential issues, and submitting your first Flink job.
Thank me by sharing on Twitter 🙏
Why Docker for Flink?
When working with distributed systems like Apache Flink, Docker is invaluable. It provides an isolated environment that replicates a production-like setup. With Docker Compose, you can spin up all required services—Flink JobManager, TaskManager, Kafka, and others—effortlessly. This eliminates the complexities of manual installation and ensures all components communicate seamlessly.
Setting Up the Docker Compose File
The first step is defining the docker-compose.yml file. My setup includes a few additional services, like Kafka and Azurite for Azure Storage emulation, but the core focus here will be Flink. Below is a snippet of how I incorporated Flink into my Docker Compose file.
services:
  flink-jobmanager:
    image: flink:latest
    container_name: flink-jobmanager
    ports:
      - "8081:8081" # Flink UI
      - "6123:6123" # RPC Port
    environment:
      - JOB_MANAGER_RPC_ADDRESS=flink-jobmanager
    command: jobmanager
    networks:
      - eventhub-net

  flink-taskmanager:
    image: flink:latest
    container_name: flink-taskmanager
    depends_on:
      - flink-jobmanager
    environment:
      - JOB_MANAGER_RPC_ADDRESS=flink-jobmanager
    command: taskmanager
    networks:
      - eventhub-net

networks:
  eventhub-net:
    driver: bridge
Key Points:
- JobManager and TaskManager: Flink requires these two services. The JobManager orchestrates tasks, while the TaskManager executes them.
- Port Exposure: The JobManager exposes the web dashboard on port
8081and its RPC endpoint on port6123. - Networking: Both services are connected to a shared Docker network to ensure they can communicate.
With this file in place, you can start the services:
Nexus: A Brief History of Information Networks from the Stone Age to AI
$21.66 (as of February 1, 2026 20:01 GMT +00:00 - More infoProduct prices and availability are accurate as of the date/time indicated and are subject to change. Any price and availability information displayed on [relevant Amazon Site(s), as applicable] at the time of purchase will apply to the purchase of this product.)Logitech Brio 101 Full HD 1080p Webcam for Meetings, Streaming, Desktop, Laptop, PC - Built-in Mic, Shutter, Works with Zoom, Microsoft Teams, Nintendo Switch 2’s New GameChat Mode, USB-A,-Black
$37.15 (as of February 2, 2026 03:55 GMT +00:00 - More infoProduct prices and availability are accurate as of the date/time indicated and are subject to change. Any price and availability information displayed on [relevant Amazon Site(s), as applicable] at the time of purchase will apply to the purchase of this product.)SanDisk 128GB Extreme PRO SDXC UHS-I Memory Card - C10, U3, V30, 4K UHD, SD Card - SDSDXXD-128G-GN4IN
$29.99 (as of February 2, 2026 03:55 GMT +00:00 - More infoProduct prices and availability are accurate as of the date/time indicated and are subject to change. Any price and availability information displayed on [relevant Amazon Site(s), as applicable] at the time of purchase will apply to the purchase of this product.)docker-compose up -d
Once the containers are running, navigate to http://localhost:8081 to access the Flink Web Dashboard.
Troubleshooting Common Issues
When I first set this up, I encountered an error where the TaskManager couldn’t connect to the ResourceManager. The logs showed the following:
org.apache.flink.runtime.taskexecutor.TaskExecutor [] - Could not resolve ResourceManager address pekko.tcp://flink@flink-jobmanager:6123/user/rpc/resourcemanager_*
After some debugging, the solution turned out to be quite simple: explicitly expose port 6123 in the flink-jobmanager service. Adding this to the docker-compose.yml file resolved the issue:
ports:
  - "6123:6123"
If you encounter similar connectivity issues, always double-check the networking and port configurations. Docker logs for both flink-jobmanager and flink-taskmanager are invaluable for pinpointing problems.
Submitting Your First Job
With the environment set up, the next step is submitting a Flink job. Assuming you already have a compiled job JAR file, follow these steps to get it running.
Copying the JAR File
Place your Flink job JAR file in the current directory. For example, let’s use my-flink-job.jar. Copy this file into the flink-jobmanager container:
docker cp ./my-flink-job.jar flink-jobmanager:/opt/flink/jobs/
Running the Job
Now, use the Flink CLI inside the flink-jobmanager container to submit the job:
docker exec -it flink-jobmanager flink run /opt/flink/jobs/my-flink-job.jar
You should see output indicating the job has been submitted successfully. Visit the Flink Web Dashboard at http://localhost:8081 to monitor its progress.

Automating with Volumes
For convenience, you can mount a local directory as a volume in the docker-compose.yml file:
volumes:
  - ./jobs:/opt/flink/jobs
This way, you can simply place your JAR files in the ./jobs directory on your host machine and submit them directly from there.
Using the REST API
If you prefer REST APIs over the command line, Flink provides an endpoint for submitting jobs. First, upload your JAR file:
curl -X POST -H "Expect:" -F "jarfile=@my-flink-job.jar" http://localhost:8081/jars/upload
The response will include a jar-id. Use this ID to run the job:
curl -X POST http://localhost:8081/jars/<jar-id>/run
This approach is particularly useful if you’re integrating Flink into a larger automation pipeline.
Monitoring and Debugging Jobs
Once your job is running, monitoring it becomes essential. The Flink Web Dashboard is an excellent tool for this. You can view:
- Job Details: See the current state, parallelism, and duration of your job.
- Metrics: Monitor throughput, latency, and backpressure.
- Logs: Access detailed logs for debugging.
For additional insights, you can tail the JobManager logs directly:
docker logs -f flink-jobmanager
Wrapping It Up
Setting up Flink locally with Docker is an excellent way to experiment and develop stream processing applications without the complexity of managing a full cluster. By leveraging Docker Compose, you can not only deploy Flink but also integrate it seamlessly with other services like Kafka or storage emulators.
The process of submitting and monitoring jobs is straightforward once your environment is running, and tools like the Flink CLI and REST API provide flexibility for interacting with the system.
This local setup can act as a foundation for testing, prototyping, and understanding the inner workings of Apache Flink. I hope this guide makes your journey into Flink smoother and more productive.


